How to Prepare For Underfloor Heating Retrofits

At EasyFlow, we create bespoke, tailored solutions to underfloor heating installation, allowing older homes to fully enjoy the benefits of energy-efficient, consistent heating. This guide will advise you what to expect through the process of your retrofit underfloor heating installation.
What is Retrofit Underfloor Heating?
Retrofit underfloor heating is the process of carrying out an underfloor heating installation in a property that was originally built using a different heating system, like central heating or wood stoves.
In a retrofit, the old heating distribution system is removed, floor insulation and dampproof membranes are installed, before the system itself is. Compatible heat sources like gas boilers are left in place, but can be upgraded to energy-efficient heat pumps during or after the retrofit.
Does Retrofitting Tear Up the Floor?
In most retrofits, the floor structure is left intact, and only floor finishes would need to be removed. If you have suspended wooden floors, the use of floor insulation provides a sufficient base for the retrofit and does not require tearing up the floorboards.
The exception is for between-joist installations, which necessitate the temporary removal of floorboards to access the joists. The boards are then returned to their original position once the infrastructure is laid.
Can Units like Kitchen Worktops Remain in Place?
Even though heating is not installed under these units, it’s best to disassemble them as it ensures the floor insulation and damp-proof course will cover the entire floor. It is possible to leave kitchen units in place for low-profile heating installations, though we don’t recommend this as it can contribute to heat loss.
How to Prepare for Underfloor Heating Retrofit
Before an underfloor heating installation, floor preparation must be carried out exactly in accordance with the installation specifications given during your consultation or site survey. In most cases, this involves removing all furniture, ensuring certain parts of the property are accessible, and thoroughly cleaning the area of any dust and debris.
During your survey, our underfloor heating installation team will inform you of any special conditions that need to be prepared ahead of time. For example, if you are doing your own floor preparation, you need to use floor insulation of the type and thickness we recommend, fully installed before we arrive. Failure to comply with guidance may cause a delay in the installation or an issue later down the line.
While it’s better to do the installation all at once, if the property has to remain occupied during construction, it can be done in segments. It’s important to communicate this condition ahead of time so that an access plan can be tailored around this.
Advice for Homeowners
- Start clearing rooms well ahead of the install date
- Carefully remove any floor finishes you wish to reuse
- Hire a storage unit to safely store furniture
- Have a plan for where you and your pets will stay for the duration of the installation.
- You will need a valid alternative way to leave the house if you plan to live at home while screed dries.
- Vacuum your rooms the day before installation and leave windows closed.
- Turn your current heating off before installers arrive.
Advice For Commercial Clients:
- Communication with your clients and other contractors is key ahead of installation.
- They will need to know how long to wait until the screed is safe to walk on, and when construction can continue after installation.
- Create an access plan, especially for buildings that are still in use during installation.
- There must be a valid alternative way for employees/visitors to enter and leave the building while the screed is drying.
- We recommend procuring wayfinding signage to redirect employees/visitors away from the installation area.
- Ensure there is good access to the property on the day of installation.
- Have rooms cleaned thoroughly before installation, and leave windows closed
- Turn your current heating off before installers arrive.
Additional Preparation for Screeded Floors
We will need to remove doors, skirting boards and wall finishes, and you need to factor this into your plan. Doors will need to be trimmed before they are reinstalled. Once the heating is installed and the liquid screed poured, you will need to follow the liquid screed aftercare guide before you can install floor finishes, units, and return furniture to their rightful place.
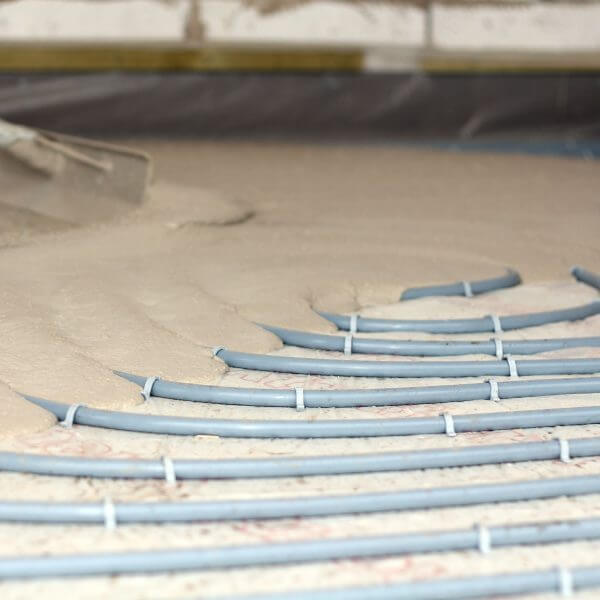
When Does Liquid Screed Dry?
The average liquid screed drying time is 1mm per day for the first 40mm of depth, then 0.5mm onwards. Within 24-28 hours, the screed will be cured enough to walk on. For 48 hours, you will need to keep the environment sealed and a plan in place for alternate access or accommodation while the screed cures.
Is it Okay for Screed to Crack?
During the liquid screed drying process, it’s natural for hairline cracks to appear as it cures. These will be fine, shallow cracks that usually appear in the 48 hours after the screed is poured. These can be filled in with floor adhesive before laying the finish.
Thicker, deeper cracks mean that the screed has dried too quickly and will require repair or replacement before laying the floor finish.
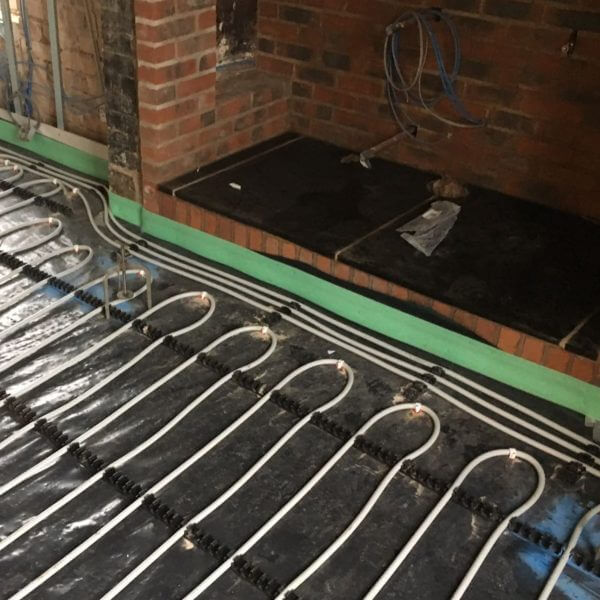
Preparing For Suspended Floor Heating
The installers will need full access to the joists, and you must ensure that all floor finishes, units, and furniture are removed. We may not need to strip the lower walls or remove doors as long as there will be good access to the floorboards.
Choose EasyFlow To Retrofit Underfloor Heating
EasyFlow is here to support you at every step during and after installation to ensure your retrofit goes as smoothly as possible. Our experienced builders can take care of all aspects, from floor preparation to accurate liquid screed drying times. Simply contact us by phone, email, or the contact form below to discuss your requirements.

Where To Find Us